A process guide for US warehouse and finance leads who want each order picked, packed, shipped and billed in NetSuite.
Last reviewed: 17 November 2026. Product details reflect this review date. Availability and behavior can vary by account, role and release.
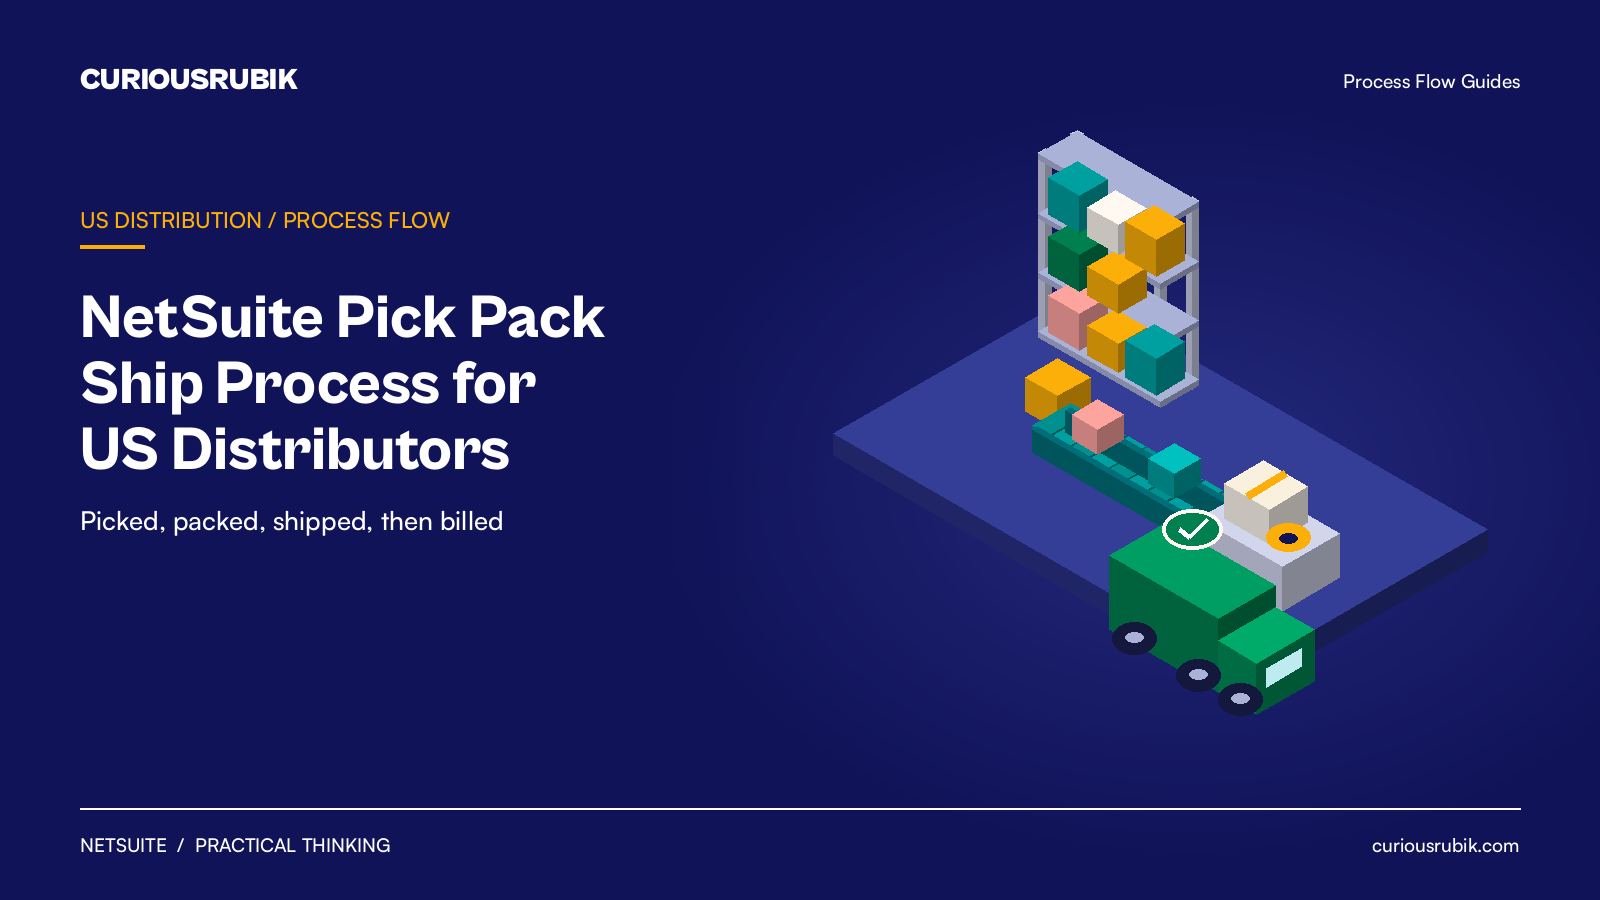
The NetSuite pick pack ship process splits fulfillment into three tracked stages on each item fulfillment record: Picked, Packed and Shipped. You turn it on with Advanced Shipping, give each stage an owner and bill from shipped orders. Only a Shipped fulfillment posts cost of goods sold, so finance must check its date and posting period.
- Enable Pick, Pack and Ship together with Advanced Shipping, then choose a default stage.
- Give picking, packing, shipping and billing each a named owner and a NetSuite page.
- Picked and Packed fulfillments do not post. The ledger moves when the order is marked Shipped.
- Watch orders that sit picked or packed for more than a day, and shipped orders not yet billed.
What is the NetSuite pick pack ship process?
Pick, Pack and Ship is a NetSuite feature that gives the warehouse and shipping teams a separate step for each part of fulfillment. Picking pulls the items from the shelf. Packing boxes them and adds the packages and tracking. Shipping hands them to the carrier.
Each fulfillment can move through all three stages. Partial shipments can create several fulfillment records for one sales order. Its Status field moves from Picked to Packed to Shipped. Authorized users can review the sales order and its linked fulfillments to check progress by line.
The feature works with Advanced Shipping. Advanced Shipping separates fulfillment from billing, so the warehouse ships and accounts receivable invoices on its own schedule. For most US distributors that is the right model. Partial shipments, backorders and ship complete customers all become easier to manage.
How do you set up Pick, Pack and Ship in NetSuite?
An administrator should agree the stage owners and billing policy before setup. Test it in your sandbox with a few real orders before you switch production over.
- Go to Setup > Company > Enable Features. On the Transactions subtab, check Pick, Pack and Ship and Advanced Shipping, then save.
- Go to Setup > Accounting > Setup Tasks > Shipping. Set Default Item Fulfillment Stage to Picked if your team works stage by stage. Pick Shipped if most orders leave the same hour they are picked.
- If you print carrier labels through Shipping Label Integration, set Shipping Label Creation Stage. Choose the earliest stage at which your packers have the box weight and size.
- Go to Setup > Accounting > Accounting Preferences, then the Order Management subtab. Under Picking/Packing, review Show Uncommitted Items on Picking Tickets. Set Show Additional Items on Packing Slips to match your packing policy.
- Use Name for Picked Status, Name for Packed Status and Name for Shipped Status only if your floor needs different words. Most teams keep Picked, Packed and Shipped.
- Check Update Transaction Date Upon Fulfillment Status Change if orders often get picked in one month and shipped in the next.
- Give the warehouse roles the permissions to fulfill orders and print forms, and keep billing permissions with finance.
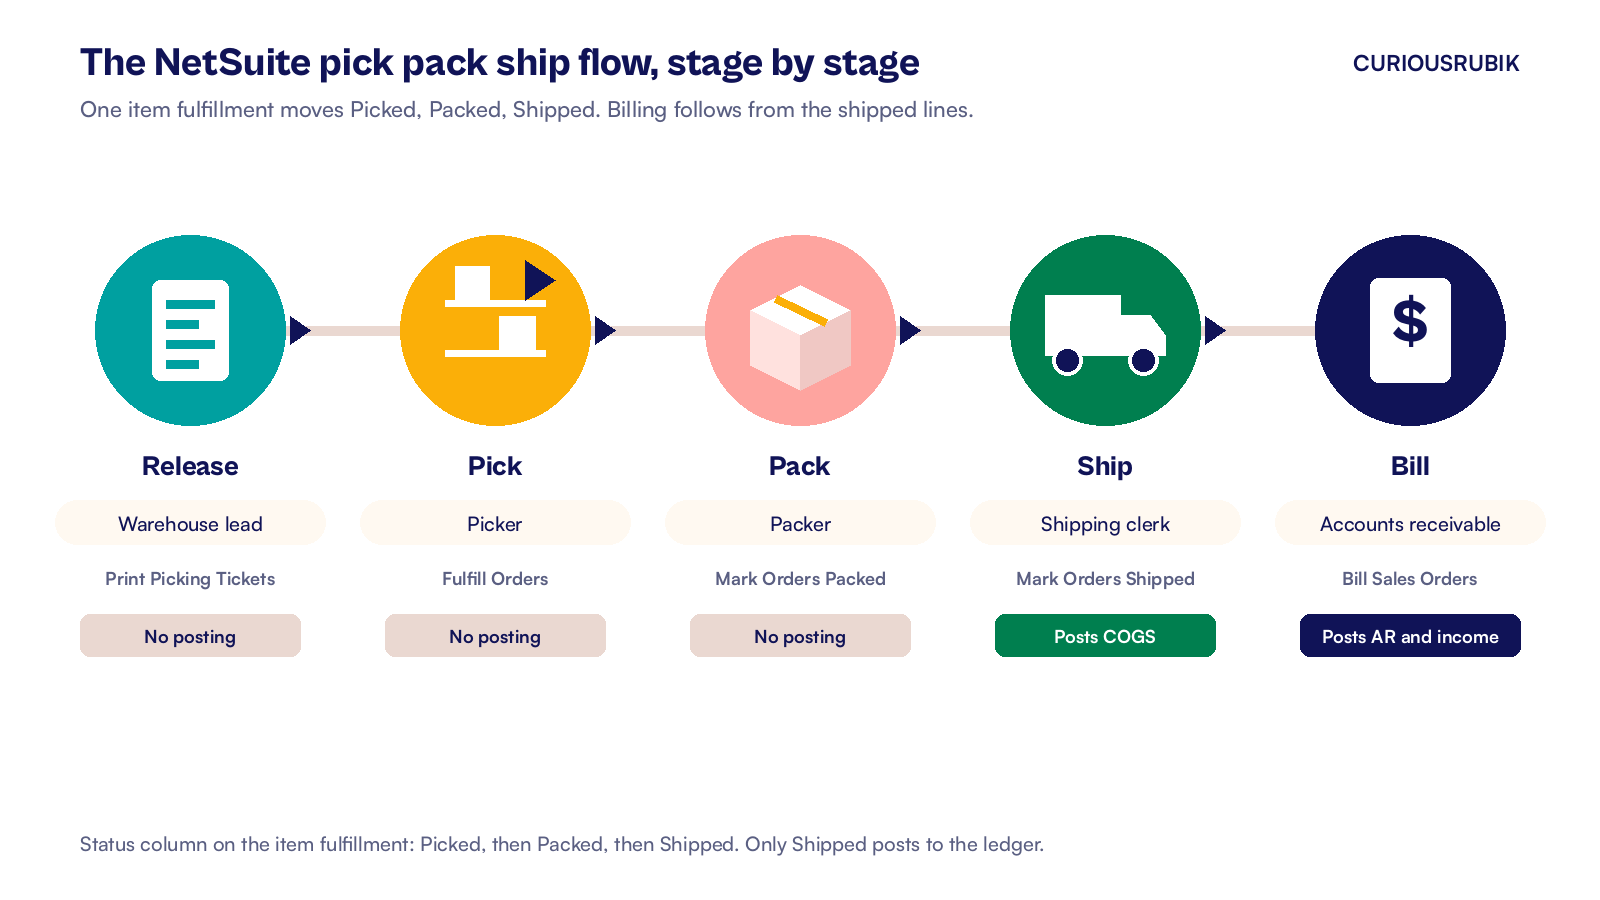
How does an order move from pick to ship?
Each stage has an owner, a NetSuite page and one change to the record. Writing this down is the single most useful step in the whole process. It stops two people working the same order and nobody working the next one.
| Stage | Owner | NetSuite page | What changes |
|---|---|---|---|
| Release | Warehouse lead | Print Picking Tickets | Committed orders get a ticket for the picker |
| Pick | Picker | Fulfill Orders | An item fulfillment is created with status Picked |
| Pack | Packer | Mark Orders Packed or the Mark Packed button | Packages, weights and tracking are added |
| Ship | Shipping clerk | Mark Orders Shipped or the Mark Shipped button | Status becomes Shipped and the fulfillment posts |
| Bill | Accounts receivable | Bill Sales Orders | An invoice or cash sale is created from the shipped lines |
Release and pick
The warehouse lead prints picking tickets from Transactions > Management > Print Checks and Forms > Picking Tickets. Filter by location and by commitment. All Items Fully Committed keeps the pickers on orders that can actually ship.
Pickers then use Transactions > Order Management > Fulfill Orders. To pick many orders at once, set the location in Bulk Fulfill From Location. Choose a filter such as Respect Ship Complete, and choose Picked in Set Shipment Status To. NetSuite processes the batch in the background.
Pack
Packing happens on the Mark Orders Packed page or on the fulfillment itself. The Shipping and Packages subtabs open once the status is Packed or Shipped. Packers add box counts, weights and tracking numbers there.
Bulk packing opens Job Status if processing takes more than ten seconds. Its Order Processing Log identifies processed orders and errors. Bulk fulfillment uses its own processing status and results pages.
Ship and bill
The shipping clerk marks orders shipped when the carrier collects them, in bulk or one at a time. Accounts receivable then bills from Transactions > Sales > Bill Sales Orders. Advanced Shipping keeps billing separate, so you can invoice a partial shipment now. It also permits billing the entire order, so checking shipped quantities is a finance control.
A hypothetical month end order from pick to invoice
A hypothetical Ohio distributor takes an order on 28 January 2027 for 40 cases of floor cleaner. Each case costs $12 and sells for $20, so the order is $800 and its cost is $480. Sales tax is left out to keep the numbers simple.
The order is picked and packed on 29 January. The carrier misses the pickup, and the boxes sit on the dock until 1 February. The clerk marks the order shipped that morning, and accounts receivable bills it the same day.
Here is what the ledger sees:
- 28 January, sales order. No posting. A sales order is a commitment, not an accounting entry.
- 29 January, Picked, then Packed. No posting. The cases are boxed, but their $480 still sits in Inventory Asset.
- 1 February, Shipped. The fulfillment posts a $480 debit to cost of goods sold and a $480 credit to Inventory Asset. Here, Ship Date is empty before the status change. The enabled preference fills it and Transaction Date with 1 February. The selected open period is February.
- 1 February, invoice. Accounts receivable is debited $800 and sales income is credited $800.
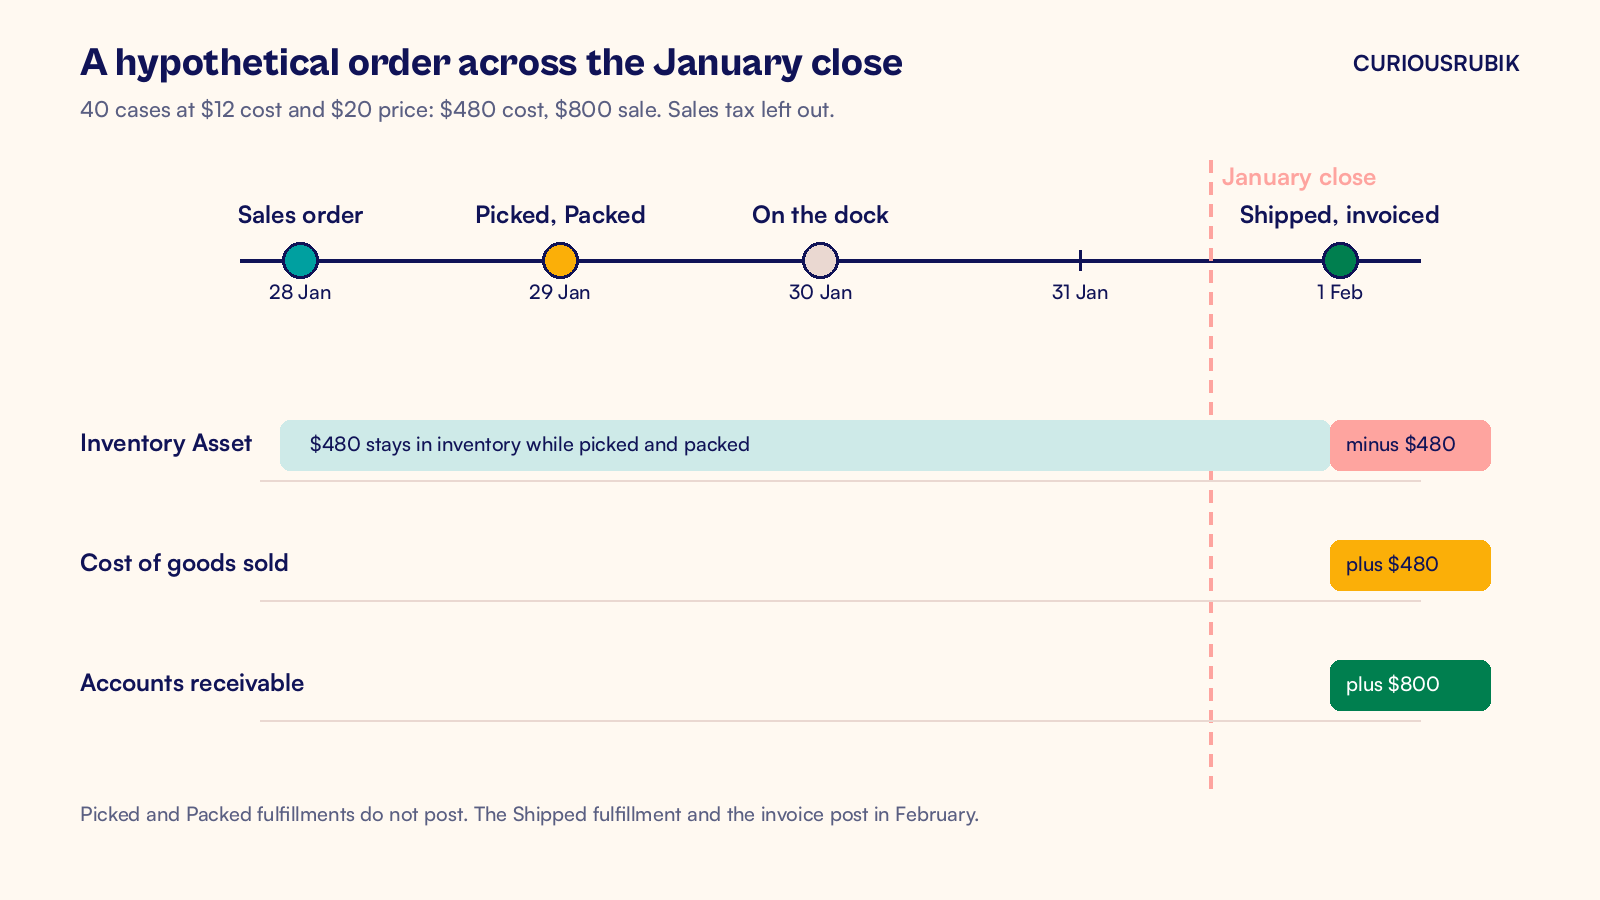
If Ship Date already contains a value, the preference does not guarantee a fresh Transaction Date. Review both dates and Accounting Period before saving.
Two lessons follow for the January close. The boxed cases on the dock are still inventory, so the count team should count them. Also, a Shipped fulfillment cannot be saved into a closed period, so any late status change needs an open period.
Which best practices keep the warehouse and finance in step?
These habits come from the questions finance teams ask most often after go live.
- Pick one status owner per stage. The table above only works if each person knows which button is theirs.
- Bill from shipped orders only. Run Bill Sales Orders on a set rhythm, daily for most distributors. Partially processed orders must be billed one at a time, so leave room for those.
- Use the bulk pages, then read the log. Bulk pages reduce repeated entry. Review fulfillment processing results and the packing or shipping Order Processing Log so failed orders get attention.
- Keep labels at the right stage. If labels print at Packed, the tracking number is already on the record when the order ships, and the customer email can carry it.
- Decide on packing slip content once. Choose None, Unfulfilled Items on Order or All Items on Order. None shows only the current shipment. Set this preference once and test a partial shipment.
- Treat special orders and drop ships as their own lanes. Special order lines wait for their linked purchase order receipt. Drop ship lines never touch your shelves. Our guides to NetSuite special order items and NetSuite drop ship orders cover each lane.
- Check group charges across entities. A US parent on NetSuite OneWorld that bills a Singapore warehouse subsidiary for shared services creates a cross border service charge. The Singapore side may need NetSuite GST reverse charge in Singapore, so loop in the tax team.
Which numbers show the process is working?
Use saved searches for the first four measures and review bulk processing results separately. Put the order measures on warehouse and controller dashboards. Each one points to a person who can act on it.
- Order to ship time. Days from sales order date to Ship Date, by location. A rising average is the first sign of a staffing or stock problem.
- Picked or packed for more than 24 hours. Item fulfillments with status Picked or Packed and a Pick Date older than one day. These are the boxes on the dock.
- Fulfillments by status at month end. Count Picked and Packed fulfillments at month end. Calculate their cost using a finance approved method, since these records have no posting cost entry. Finance uses it to plan the count.
- Shipped but not billed. Sales orders with status Pending Billing or Pending Billing/Partially Fulfilled. Any order here after a day is cash waiting to be collected.
- Failed bulk jobs. Review the processing results pages each morning. Have the warehouse lead assign each error to an owner and confirm the retry succeeds.
Pick, pack and ship is one part of the wider flow. Our NetSuite order to cash process guide follows the order from entry through to the bank deposit.
The next step is simple. Pull last month's orders and measure how many sat picked or packed overnight, and how many shipped orders waited more than a day for an invoice. Those two numbers tell you where to start.
At CuriousRubik, our NetSuite optimization team can turn them into a working setup, from status owners to the saved searches. See our work with wholesale and distribution companies and our NetSuite United States page.
Related reading
NetSuite Order to Cash Process: Flow and Best Practices
The full order to cash flow in NetSuite with an owner and a control for each step.
NetSuite Special Order Items: A Guide for US Distributors
How special order items link a customer order to its purchase order and receipt.
NetSuite Drop Ship Orders for US Distributors
How drop ship items send the order straight from your vendor to the customer.